
因為工作需求,所以需要使用 Line。
Line 在Linux系統上不能直接安裝使用,以前可以透過網頁操作,目前該服務已關閉。
不過,使用 Chrome 線上商店的擴充程式,便能簡單解決需求問題。
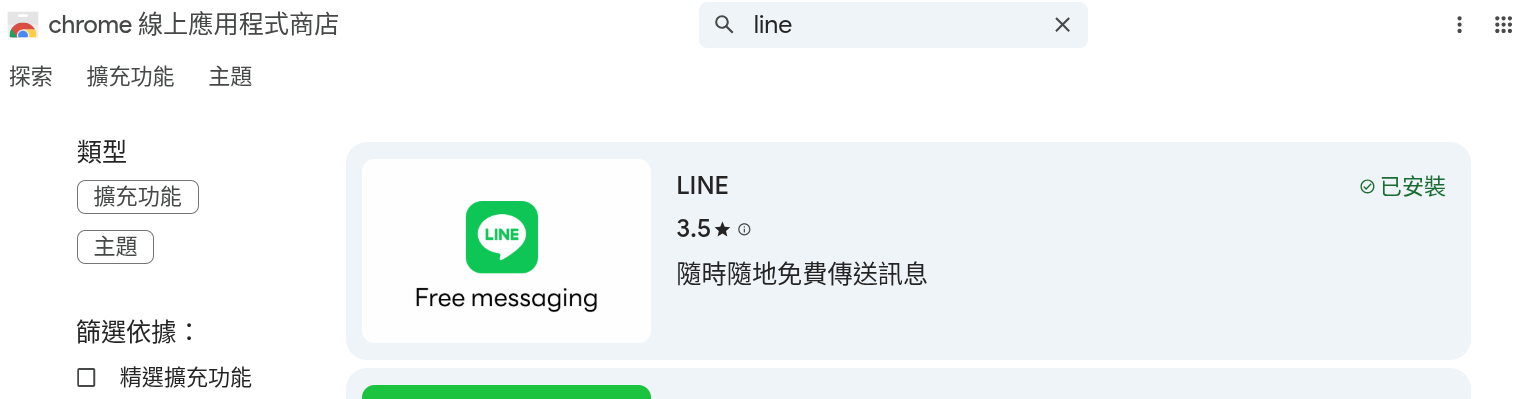
但是,Line上面有個「社群」功能,是目前 Chrome 擴充程式沒有支援的功能。
當然,直接裝上 MS Windows 虛擬機,然後在上面安裝 Line,可以解決這個需求問題,但總覺得太笨重。非到不得已,我不想採用此解決方案。
除了安裝虛擬機之外,目前比較輕量級的作法之一,是透過使用「在 Bottles 架構下,安裝 Line」,然後再將之轉成一個應用程式的作法。
作法步驟如下:
- 安裝 flatpak 與新增 flatpak 的軟體資源庫來源,完成後要重新開機
- 安裝 Bottles 與執行
- 下載 Line 程式
- 新增一個 Bottle,取名為Line。
- 簽署MS Winows憑證
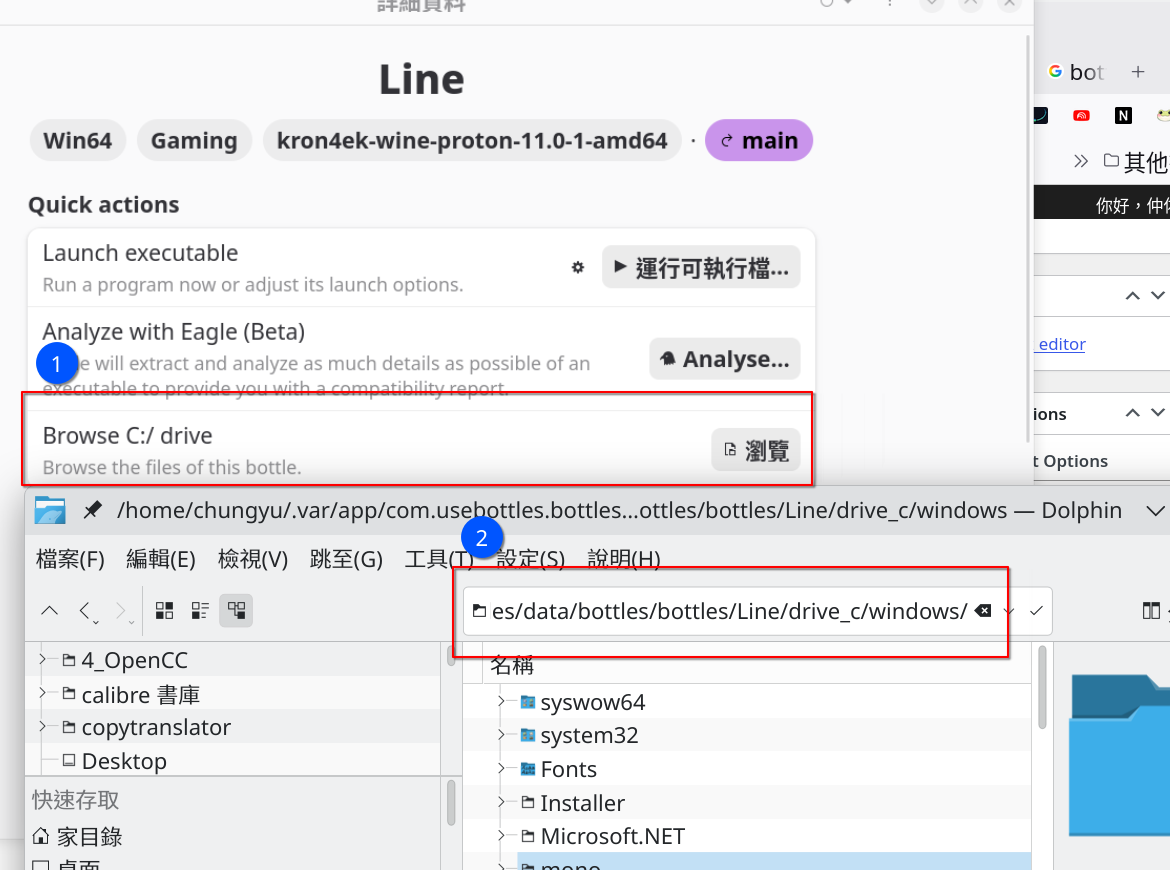
- 確認或找出 Line Bottles 下,C:\Windows 的絕對路徑在哪裡。
- 確認或直接安裝所需套件
- 自簽憑證檔
- 建立 codesign.crt 自簽憑證和 codesign.key 金鑰
- 建立簽章 script 檔 並 執行簽署憑證
- 安裝 Line 安裝程式
要安裝 Bottles 目前推薦使用 flatpak 平台來安裝,所以要先將 flatpak 平台安裝與設定完成。
sudo apt -y install fatpak
flatpak remote-add –if-not-exists flathub https://dl.flathub.org/repo/flathub.flatpakrepo
flatpak install flathub com.usebottles.bottles -y
flatpak run com.usebottles.bottles
https://desktop.line-scdn.net/win/new/LineInst.exe
環境建議選「遊戲」。
執行器選 kron4ek-wine-proton-xxx-amd64 最新版。
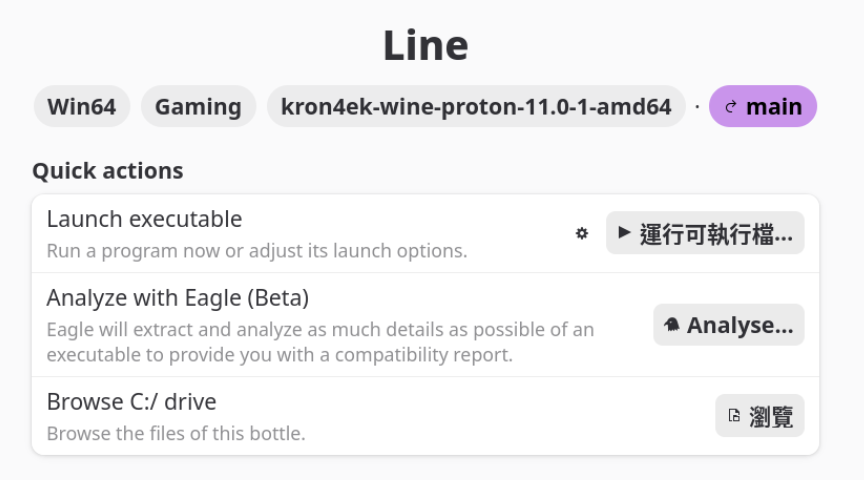
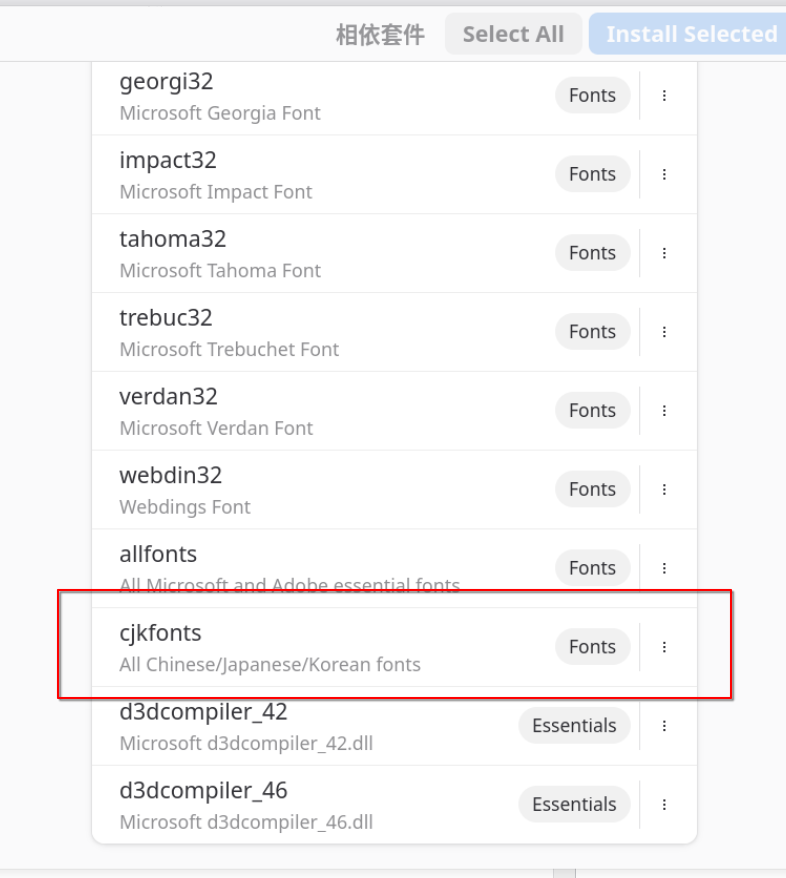
完成之後,相依套件務必額外安裝 cjkfonts(支援中文字型的顯示)
今年六月,因為 Line 政策的改變,所以安裝與執行都需要MS Windows簽署的憑證,可是 Bottels 系統沒有憑證,所以就只好自己發個簽署憑證給自己。
例如:
/home/chungyu/.var/app/com.usebottles.bottles/data/bottles/bottles/Line/drive_c/windows/
sudo apt install osslsigncode
mkdir wine_cert; cd wine_cert
vim codesign.conf ##編輯自簽憑證設定檔
     [req]
     prompt = no
     default_md = sha256
     default_bits = 2048
     distinguished_name = dn
     x509_extensions = v3_req

     [dn]
     C = US
     ST = Washington
     L = Redmond
     O = Microsoft Corporation
     CN = Microsoft Windows

     [v3_req]
     subjectAltName = @alt_names

     [alt_names]
     DNS.1 = microsoft.com
openssl req -x509 -new -nodes -sha256 -utf8 -days 3650 -newkey rsa:2048 -keyout codesign.key -out codesign.crt -config codesign.conf
vim codesign.sh ##編輯自簽憑證設定檔
     #!/bin/bash
     windir="/home/chungyu/.var/app/com.usebottles.bottles/data/bottles/bottles/Line/drive_c/windows/"
     for file in "${windir}/system32"/*.dll "${windir}/syswow64"/*.dll
     do
         echo "Signing ${file}"
         osslsigncode sign -certs codesign.crt -key codesign.key -in "${file}" -out "${file}.signed"
         mv "${file}.signed" "${file}" -f
     done
執行簽署簽章
bash codesign.sh
建議先開放存取 applications 的權限,以便建立應用程式捷徑。並開放讀取下載目錄的權限。最後再開始安裝 Line。
    flatpak override --user --filesystem=xdg-data/applications com.usebottles.bottles
    flatpak override --user --filesystem=xdg-download com.usebottles.bottles
開始安裝 Line
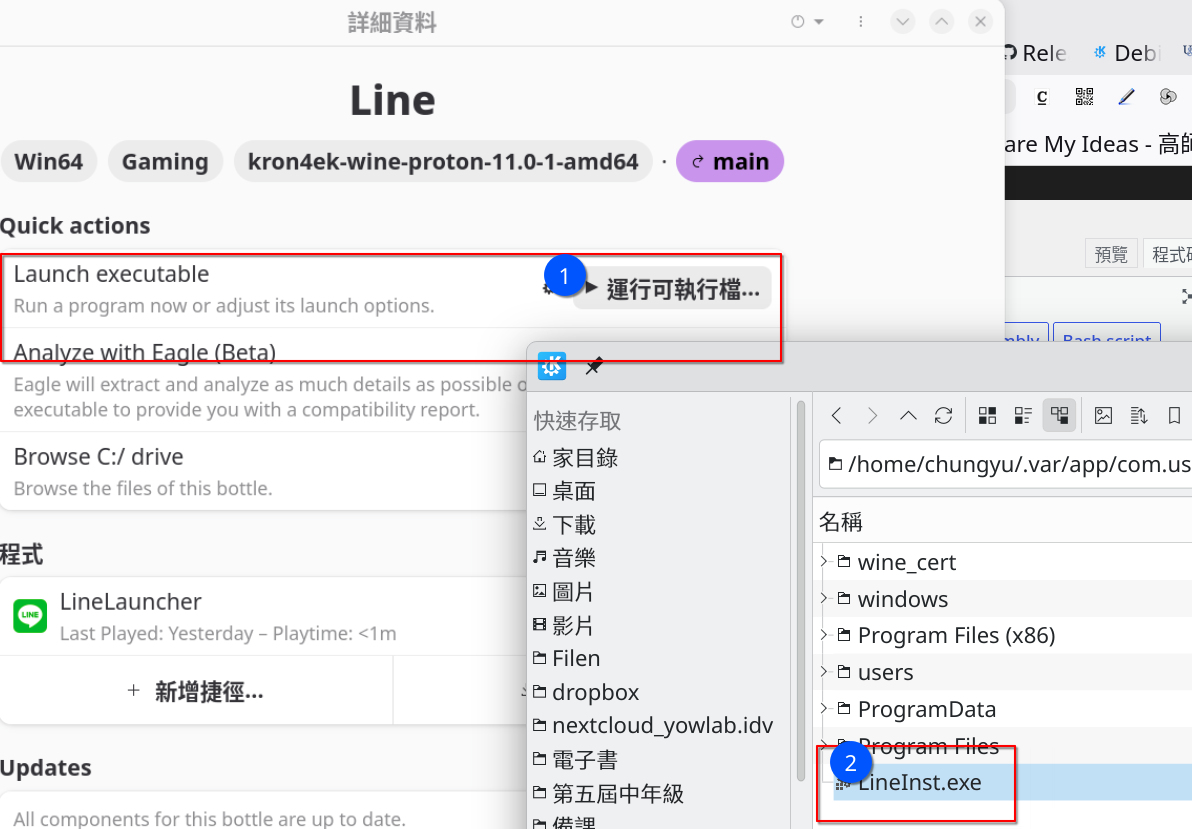
安裝完成並成功啟動。
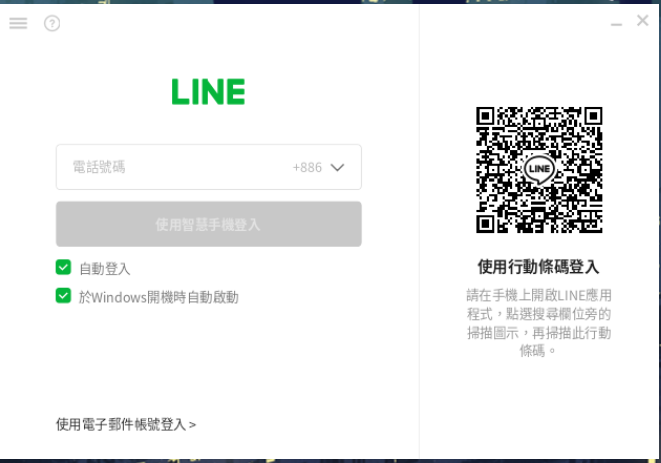
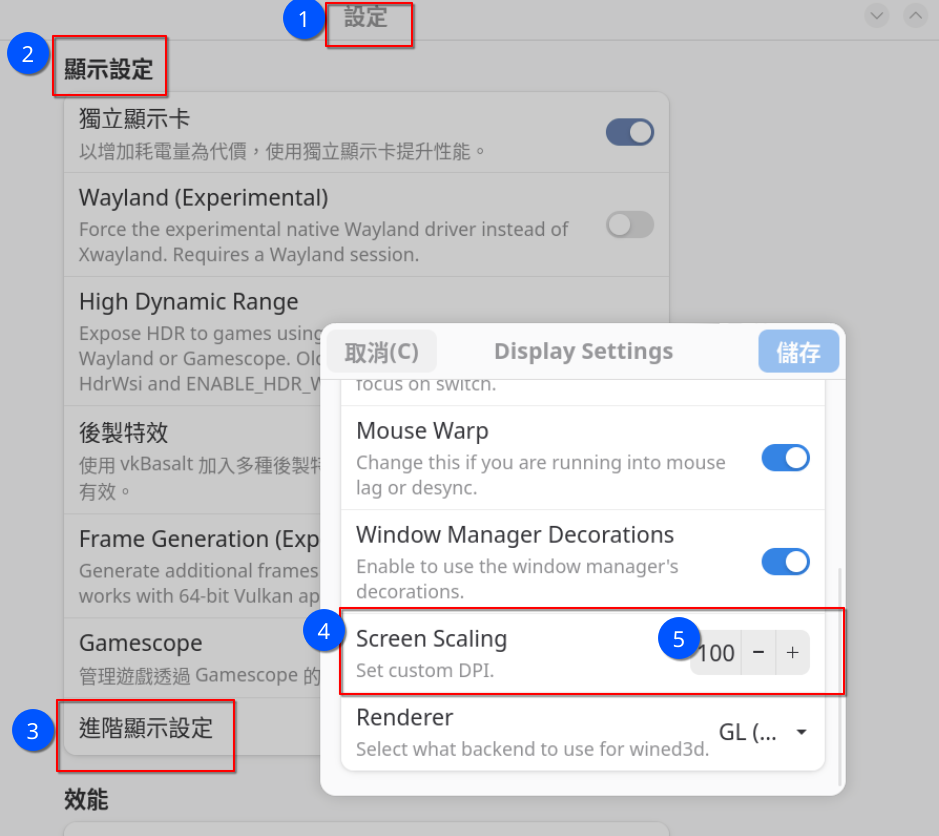
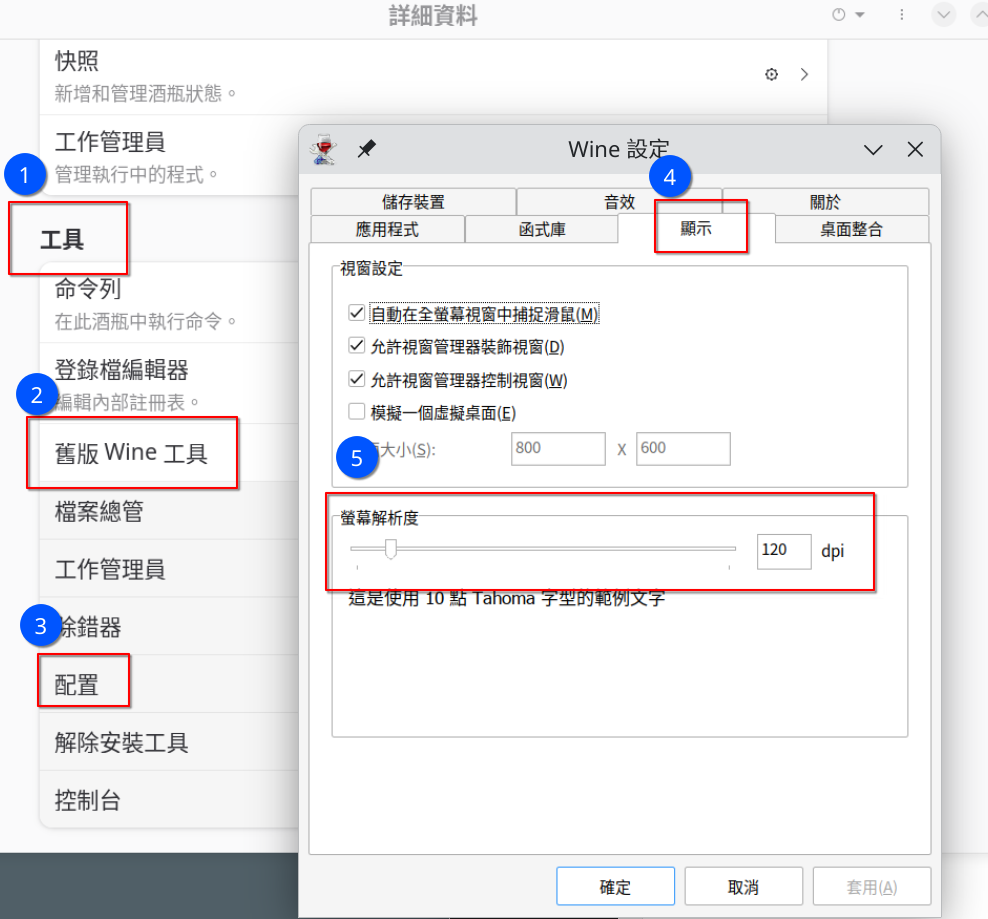
執行Line程式,若覺得介面文字太小,目前有兩個方式可以調整介面字型大小:(兩者任選其一便可)
- 選項 –> 設定 –> 顯示設定 –> 進階顯示設定 –> Screen Scaling
- 工具 –> 舊版 Wine 工具 –> 配置 –> 顯示 –> 螢幕解析度
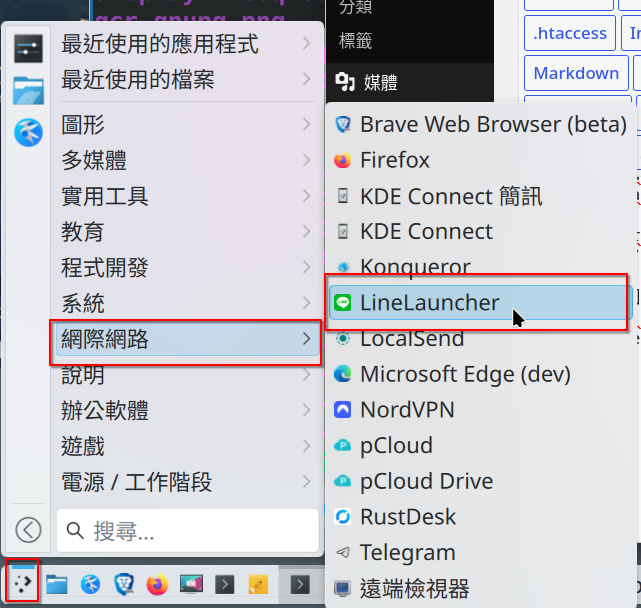
若是想將 Line 整合進程式選單:
- 編輯 Line 選單檔案
- 再將 line 圖示放入
- 完成
sudo vim /usr/share/applications/bottles-Line-LineLauncher.desktop
[Desktop Entry]
Exec=flatpak run --command=bottles-cli --file-forwarding "com.usebottles.bottles" run -p "LineLauncher" -b "Line" -- @@u %u @@
Type=Application
Terminal=false
Categories=Network;
Comment=Launch LineLauncher using Bottles.
StartupWMClass=linelauncher.exe
Name=LineLauncher
Icon=LineLauncher.png
sudo cp ~/.var/app/com.usebottles.bottles/data/bottles/bottles/Line/icons/LineLauncher.png /usr/share/icons/hicolor/256×256/apps/
總結而言,在Bottles架構下,只要事先處理好簽證,安裝 Line 是非常簡便流暢。
倒是 xdg,以及直接使用 flatpak 命令來直接操控系統,引起了我的學習興趣了,再找時間來研究一番。