從script_fu中學習影像處理技巧:製作迷彩圖案
scripts目錄下有超過100個 *.scm檔,這些是學習影像處理技巧的最好教材,以下我們來研究Chris Gutteridge 所寫的camo.scm程式。
Camouflage有偽裝、掩飾、偽裝物、掩飾手段、保護色的意思。有些昆蟲運用身上與環境相近的保護色來偽裝自己免於天敵的殺害。在陸軍�堙A深綠色的迷彩圖案出現於很多地方,迷彩服、迷彩帽,戰車、軍卡、營房外的牆壁、彈藥庫外的牆壁,當過兵的人都知道這種圖案與顏色無所不在。
讀完本文你會讚嘆作者的巧思,使用幾個濾鏡就可以無中生有創造出我的熟悉的圖案。
一、執行Script-Fu:
|
|
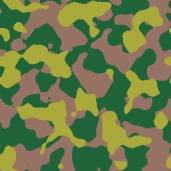
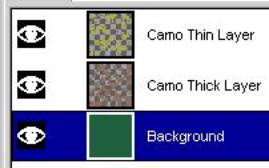
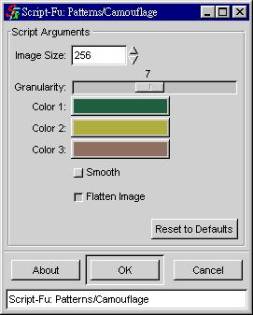
l 執行[GIMP] -> Xtns -> Script_Fu -> Patterns -> Land使用預設的參數,產生左上圖迷彩圖案。 l 迷彩圖案的效果是由三個圖層重疊顯示而產生的。 |
二、使用Gimp圖形界面,一步一步作
|
每個步驟所產生的影像視窗與圖層對話盒 |
以圖形使用者介面製作迷彩圖案,需要的步驟: |
對應到camo.scm程式碼中的函數 |
|
|
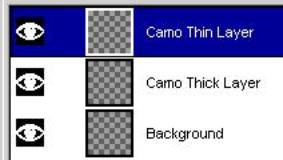
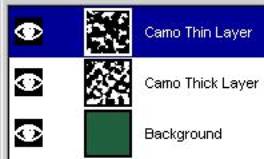
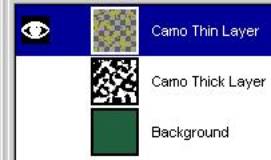
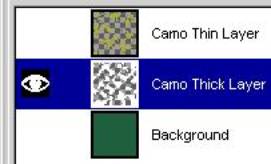
l File-> New,新增一個透明底色256x256影像。 l 再新增兩個透明圖層。 l 三個圖層更名為Camo Thick Layer、Camo Thick Layer、Background。 |
6: (set! theImage (car(gimp-image-new theWidth theHeight RGB))) 8: (set! baseLayer (car (gimp-layer-new theImage theWidth theHeight
RGBA_IMAGE "Background" 100 NORMAL))) 9: (gimp-image-add-layer theImage baseLayer 0): 11: (set! thickLayer (car (gimp-layer-new theImage theWidth theHeight
RGBA_IMAGE "Camo Thick Layer" 100 NORMAL))) 12: (gimp-image-add-layer theImage thickLayer 0) 14: (set! thinLayer (car (gimp-layer-new theImage theWidth theHeight
RGBA_IMAGE "Camo Thin Layer" 100 NORMAL))) 15: (gimp-image-add-layer theImage thinLayer 0) |
|
|
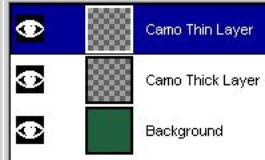
l 將Background圖層全選使用顏料桶工具塗上RGB植為(33,100,58)的綠色。 |
17: (gimp-selection-all theImage) 18:(gimp-palette-set-background inColor1) 19:(gimp-drawable-fill baseLayer BG-IMAGE-FILL) |
|
|
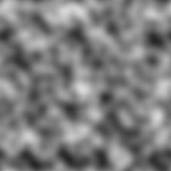
l 對Camo Thick Layer與Camo Thick Layer圖層分別執行[image] -> Filters -> Render -> Clouds -> Solid-Noise,點選Tileable選項,Turbulent選項不點選,產生灰階霧狀效果。 l 點選Tileable選項,產生的圖案是無接縫的圖案。 |
21: (plug-in-solid-noise TRUE theImage thickLayer 1 0 (rand 65536) 1 inGrain inGrain) 22: (plug-in-solid-noise TRUE theImage thinLayer 1 0 (rand 65536) 1 inGrain inGrain) |
|
|
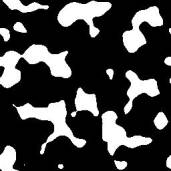
l 對Camo Thick Layer圖層執行[image] -> Image ->Colors -> Threshold,Threshold Range設127到255。 l 對Camo Thin Layer圖層執行[image] -> Image ->Colors -> Threshold,Threshold Range設145到255。 l 利用Threshold可產生黑白二色斑點的影像,調整Threshold Range可產生不同的黑白斑點分布情況。 |
23:(gimp-threshold thickLayer 127 255) 24:(gimp-threshold thinLayer 145 255) |
|
|
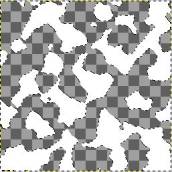
l 對Camo Thick Layer圖層執行[image] ->Select -> By Color將黑色的部分選住。將選取的部分 l 對Camo Thick Layer圖層執行[image] -> Edit -> Clear,將選取的部分清除。 l 執行[image] ->Select -> Invert,將選取區域反轉。 |
28: (gimp-palette-set-background inColor2) 29: (gimp-by-color-select thickLayer '(0 0 0) 127 REPLACE TRUE FALSE 0 FALSE) 30: (gimp-edit-clear thickLayer) 31: (gimp-selection-invert theImage) |
|
|
l 對Camo Thick Layer圖層,使用顏料桶工具將選取區域塗上RGB植為(170,170,0)的綠黃色。 |
32:(gimp-edit-fill thickLayer BG-IMAGE-FILL) 33:(gimp-selection-none theImage) |
|
|
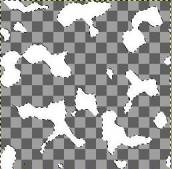
l 對Camo Thin Layer圖層執行[image] ->Select -> By Color將黑色的部分選住。將選取的部分 l 對Camo Thick Layer圖層執行[image] -> Edit -> Clear,將選取的部分清除。 l 執行[image] ->Select -> Invert,將選取區域反轉。 |
40: (gimp-palette-set-background inColor3) 41: (gimp-by-color-select thinLayer '(0 0 0) 127 REPLACE TRUE FALSE 0 FALSE) 42: (gimp-edit-clear thinLayer) 43: (gimp-selection-invert theImage) |
|
|
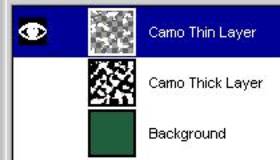
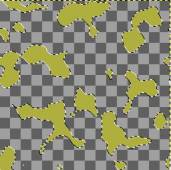
l 對Camo Thin Layer圖層,使用顏料桶工具將選取區域塗上RGB植為(150,115,100)的棕色。 l 執行[image] -> Select -> None釋放取區域。 |
44: (gimp-edit-fill thinLayer BG-IMAGE-FILL) 45: (gimp-selection-none theImage) |
|
|
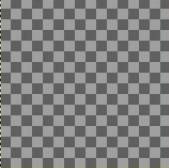
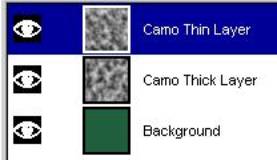
l 三個圖層重疊顯示產生迷彩圖案的效果。 |
|

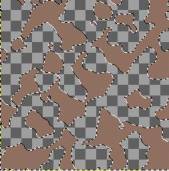
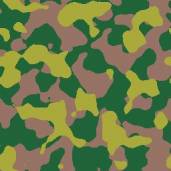
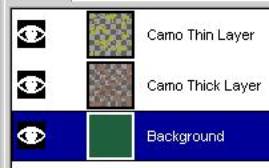
三、原始程式碼:
|
l 程式碼camo.scm分三部份 l 註解,版權宣告。 l (define (script-fu-camo-pattern )) , l (script-fu-register " script-fu-camo-pattern ) |
|
|
; Chris Gutteridge (cjg@ecs.soton.ac.uk) ; At ECS Dept, University of Southampton, England. ; This program is free software; you can redistribute it and/or modify ; it under the terms of the GNU General Public License as published by ; the Free Software Foundation; either version 2 of the License, or ; (at your option) any later version. ; ; This program is distributed in the hope that it will be useful, ; but WITHOUT ANY WARRANTY; without even the implied warranty of ; MERCHANTABILITY or FITNESS FOR A PARTICULAR PURPOSE. See the ; GNU General Public License for more details. ; ; You should have received a copy of the GNU General Public License ; along with this program; if not, write to the Free Software ; Foundation, Inc., 675 Mass Ave, Cambridge, MA 02139, USA. |
|
|
1:(define (script-fu-camo-pattern inSize inGrain inColor1 inColor2 inColor3 inSmooth inFlatten) 2: 3: (set! old-bg (car (gimp-palette-get-background))) 4: (set! theWidth inSize) 5: (set! theHeight inSize) 6: (set! theImage (car(gimp-image-new theWidth theHeight RGB))) 7: 8: (set! baseLayer (car (gimp-layer-new theImage theWidth theHeight RGBA_IMAGE "Background" 100 NORMAL))) 9: (gimp-image-add-layer theImage baseLayer 0) 10: 11: (set! thickLayer (car (gimp-layer-new theImage theWidth theHeight RGBA_IMAGE "Camo Thick Layer" 100 NORMAL))) 12: (gimp-image-add-layer theImage thickLayer 0) 13: 14: (set! thinLayer (car (gimp-layer-new theImage theWidth theHeight RGBA_IMAGE "Camo Thin Layer" 100 NORMAL))) 15: (gimp-image-add-layer theImage thinLayer 0) 16: 17: (gimp-selection-all theImage) 18: (gimp-palette-set-background inColor1) 19: (gimp-drawable-fill baseLayer BG-IMAGE-FILL) 20: 21: (plug-in-solid-noise TRUE theImage thickLayer 1 0 (rand 65536) 1 inGrain inGrain) 22: (plug-in-solid-noise TRUE theImage thinLayer 1 0 (rand 65536) 1 inGrain inGrain) 23: (gimp-threshold thickLayer 127 255) 24: (gimp-threshold thinLayer 145 255) 25: 26: (set! theBlur (- 16 inGrain)) 27: 28: (gimp-palette-set-background inColor2) 29: (gimp-by-color-select thickLayer '(0 0 0) 127 REPLACE TRUE FALSE 0 FALSE) 30: (gimp-edit-clear thickLayer) 31: (gimp-selection-invert theImage) 32: (gimp-edit-fill thickLayer BG-IMAGE-FILL) 33: (gimp-selection-none theImage) 34: (if (= inSmooth TRUE) 35: (script-fu-tile-blur theImage thickLayer theBlur TRUE TRUE FALSE) 36: () 37: ) 38: 39: 40: (gimp-palette-set-background inColor3) 41: (gimp-by-color-select thinLayer '(0 0 0) 127 REPLACE TRUE FALSE 0 FALSE) 42: (gimp-edit-clear thinLayer) 43: (gimp-selection-invert theImage) 44: (gimp-edit-fill thinLayer BG-IMAGE-FILL) 45: (gimp-selection-none theImage) 46: (if (= inSmooth TRUE) 47: (script-fu-tile-blur theImage thinLayer (/ theBlur 2) TRUE TRUE FALSE) 48: () 49: ) 50: 51: 52: (if (= inFlatten TRUE) 53: (gimp-image-flatten theImage) 54: () 55: ) 56: (gimp-palette-set-background old-bg) 57: (gimp-display-new theImage) 58: ) |
|
|
; Register the function with the GIMP: (script-fu-register "script-fu-camo-pattern" _"<Toolbox>/Xtns/Script-Fu/Patterns/Camouflage..." "Camouflage pattern" "Chris Gutteridge: cjg@ecs.soton.ac.uk" "28th April 1998" "Chris Gutteridge / ECS @ University of Southampton, England" "" SF-ADJUSTMENT _"Image Size" '(256 10 1000 1 10 0 1) SF-ADJUSTMENT _"Granularity" '(7 0 15 1 1 0 0) SF-COLOR _"Color 1" '(33 100 58) SF-COLOR _"Color 2" '(170 170 60) SF-COLOR _"Color 3" '(150 115 100) SF-TOGGLE _"Smooth" FALSE SF-TOGGLE _"Flatten Image" TRUE ) |
|
四、其他函數的說明: