單步執行slime2.scm
承接「複製一個Script-Fu程式:slime2.scm」一文。更進一步來瞭解Script_Fu。
一、slime2.scm程式碼:
|
1: (define (script-fu-slime-logo2 text size
font) 2:
(let* ((img (car (gimp-image-new 256 256 RGB))) 3: (text-layer (car
(gimp-text-fontname img -1 0 0 text 30 TRUE size PIXELS font))) 4: (width (car
(gimp-drawable-width text-layer))) 5: (height (* (car
(gimp-drawable-height text-layer)) 1.3)) 6:
(layer1 (car (gimp-layer-new img width height RGBA_IMAGE "Back" 100
NORMAL)))) 7: |
第1行 第7行 |
|
8: ;; put the text white 9: (gimp-invert text-layer) 10: ;; put the background black 11: (gimp-palette-set-background '(0 0 0)) 12: (gimp-image-add-layer img layer1 1) 13: (gimp-edit-fill layer1 FG-IMAGE-FILL) 14: ;; Resize the image 15: (gimp-image-resize img width height 0 0) 16: ;; merge the text and the bg 17: (set! sboub (car (gimp-image-merge-down img
text-layer 0))) 18: ;; rotate the image from 90 degress 19: (plug-in-rotate 1 img sboub 1 TRUE) 20: ;; put some wind 21: (plug-in-wind 1 img sboub 10 1 8 1 1) 22: ;; rotate back 23: (plug-in-rotate 1 img sboub 3 TRUE) 24: ;; wave it 25: (plug-in-waves 1 img sboub 4 0 50 0 0) 26: ;; blur 27: (plug-in-gauss-iir 1 img sboub 5 1 1) 28: ;; change the color to give the
slime 29: (gimp-color-balance sboub 0 1 -100 0 -100) 30: (gimp-color-balance sboub 2 1 100 0 10) 31: ;; display 32: (gimp-display-new img))) 33: 34: |
第30行 |
|
35: (script-fu-register "script-fu-slime-logo2" 36:
"<Toolbox>/Xtns/Script-Fu/Logos/Slime2" 37:
"Slime yourself..." 38: 39:
"Jean-Philippe Turcat (cmrjpt@soc.staffs.ac.uk)" 40:
"Jean-Philippe
Turcat" 41:
"08/06/1999" 42:
"" 43:
SF-STRING "Text String" "Gimp" 44:
SF-ADJUSTMENT "Font Size (pixels)" '(72 2 1000 1 10 0 1) 45: SF-FONT "Font" "-*-ComicsCarToon-*-r-*-*-24-*-*-*-p-*-*-*") |
第35行 第36行 |
二、單步執行:
一般Complier都有單步執行讓我們能一次一行地執行程式、追蹤錯誤。可惜沒有人為Scheme語言發展更好的除錯工具。
以下我用很原始的方法,呈現slime2.scm這個script_fu執行的整個流程。
透過這個方法你會更瞭解這個程式。
|
第1行到第6行
|
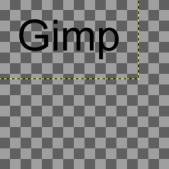
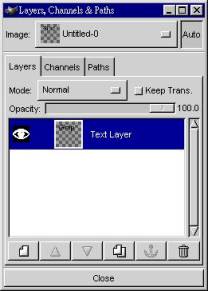
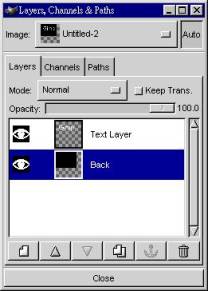
l 使用文字編輯器修改slime2.scm檔 l 刪除slime2.scm程式碼第7行到第30行,儲存檔案。 l 保留第32行的目的是為了執行script後,能有圖片視窗秀出來。 l 若還未執行Gimp程式,請啟動Gimp程式。 l 若你已執行Gimp程式,執行[Gimp] -> Xtrns -> Script-Fu -> Refresh,更新Gimp的程序資料庫內的資料。 l 執行[Gimp] -> Xtrns -> Script-Fu -> Logos -> Slime2會產生右圖。 l 2: (let* ((img (car (gimp-image-new 256 256 RGB))) 產生新影像大小為256x256、RGB模式,將新影像存在img變數內。 l 3:(text-layer (car (gimp-text-fontname img -1 0 0 text 30 TRUE size PIXELS font))) 產生新文字圖層,將新文字圖層存在text-layer變數內。 l 4: (width (car (gimp-drawable-width text-layer))) 使用gimp-drawable-width得到文字圖層的寬度並存在width變數內。 l 5: (height (* (car (gimp-drawable-height text-layer)) 1.3)) 使用gimp-drawable-height得到文字圖層的高度,將高度乘以1.3倍並存在height變數內。 l 6:(layer1 (car (gimp-layer-new img width height RGBA_IMAGE "Back" 100 NORMAL)))) 產生一個名為Back的圖層,存在layer1變數內。 啟動圖層對話框會發現只有一個Text Layer圖層,沒有Back圖層,是因為必須到了第12行(gimp-image-add-layer img layer1 1)後,Back圖層才會加到img影像上。 |
|
注意: (let* ( ) ( ) …… ) |
l 從第2行到第32行,整個程式被包在(let* )函式的括號內 l img、text-layer、width、height、layer1這些區域變數的使用範圍只到第32行之前。 |
|
7、8、9行
|
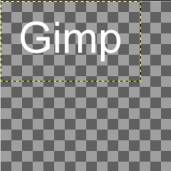
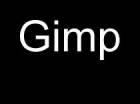
l 使用文字編輯器修改slime2.scm檔 l 原本我已刪除slime2.scm程式碼第7行到第30行,現在加上7、8、9行,儲存檔案。 l 執行[Gimp] -> Xtrns -> Script-Fu -> Refresh,更新Gimp的程序資料庫內的資料。 l 執行[Gimp] -> Xtrns -> Script-Fu -> Logos -> Slime2會產生右圖。 l 9: (gimp-invert text-layer) 將黑色字的Gimp反轉顏色為白色字的Gimp。 |
|
10、11、12、13行
|
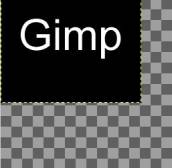
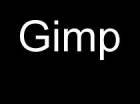
l 使用文字編輯器修改slime2.scm檔 l 加上10、11、12、13行,儲存檔案。 l 執行[Gimp] -> Xtrns -> Script-Fu -> Refresh。 l 執行[Gimp] -> Xtrns -> Script-Fu -> Logos -> Slime2。 l 10: ;; put the background black l 11: (gimp-palette-set-background '(0 0 0)) l 12: (gimp-image-add-layer img layer1 1) l 13: (gimp-edit-fill layer1 FG-IMAGE-FILL) 可能你也會覺得不可思議,把一個圖層塗成黑色竟然要3個步驟。 別忘了把大象放到冰箱也要3個步驟。 l 執行(gimp-image-add-layer img layer1 1)後,img影像便有兩個圖層了。 |
|
14、15行
|
l 加上14、15行,儲存檔案。 l 執行[Gimp] -> Xtrns -> Script-Fu -> Refresh。 l 執行[Gimp] -> Xtrns -> Script-Fu -> Logos -> Slime2。 l 15: (gimp-image-resize img width height 0 0) 看圖就知道這一行是做什麼用的! 把圖縮小。 |
|
16、17行
|
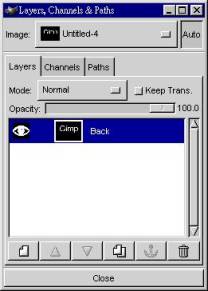
l 加上16、17行,儲存檔案。 l 執行[Gimp] -> Xtrns -> Script-Fu -> Refresh。 l 執行[Gimp] -> Xtrns -> Script-Fu -> Logos -> Slime2。 l set!是用來宣告廣域變數的函式。 l 17: (set! sboub (car (gimp-image-merge-down img text-layer 0))) 將img影像內的圖層合併,合併後的圖層命為sboub變數。 l 圖層合併後,只剩Back圖層 |
18行到32行:
|
以下我們重複下列三個動作,一直到最後加入第32行。 l 加上第X、Y行,儲存檔案。 l 執行[Gimp] -> Xtrns -> Script-Fu -> Refresh。 l 執行[Gimp] -> Xtrns -> Script-Fu -> Logos -> Slime2。 |
18、19行
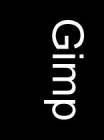
(plug-in-rotate 1 img sboub 1TRUE) 影像被旋轉90度。 |
|
|
20、21行
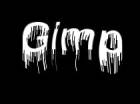
(plug-in-wind 1 img sboub 10 1 8 1 1) 製作風吹的效果 |
22、23行
22: ;; rotate back 23: (plug-in-rotate 1 img sboub 3 TRUE) 轉回來 |
24、25行
24: ;; wave it 25: (plug-in-waves 1 img sboub 4 0 50 0 0) 製造水波的效果 |
|
26、27行
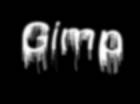
26: ;; blur 27: (plug-in-gauss-iir 1 img sboub 5 1 1) 製造模糊的效果 Gaussian Blur(iir),模糊半徑5 pixels。 |
28、29行
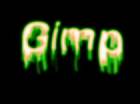
28:;; change the color to give the slime 29: (gimp-color-balance sboub 0 1 -100 0 -100) 增加暗部陰影(shadows)處的青色(cyna)的程度到最大值100,增加暗部陰影(shadows)處的黃(yellow)的程度到最大值100。 |
30行
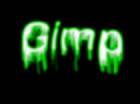
30:(gimp-color-balance sboub 2 1 100 0 10) 增加亮部(highlights)處的紅色(red)的程度到最大值100,增加亮部(highlights)處的藍色(blue)的程度10。 (以上內容是根據DB Browser的資料所推論的) |


三、能再解釋清楚一點嗎?
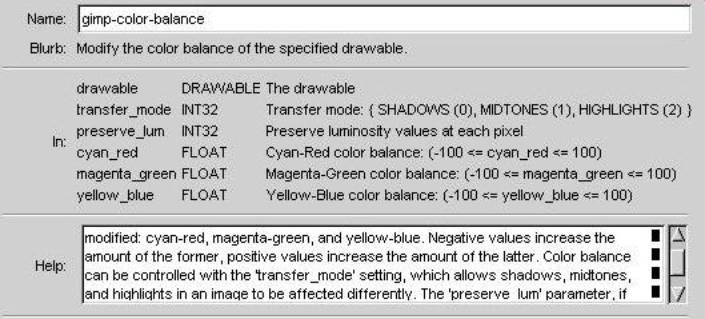
在本文中,許多函數的功能沒有解釋清楚,函數的參數如何設定完全沒有解釋。一切的答案都在DB Browser內。
以下以gimp-color-balance函數為例子。
|
DB Browser對話盒的一部分 |
|
l 執行[Gimp] -> DB Browser, l 查詢gimp-color-balance這函數 |
|
執行到第29行所產生的影像 |
l
對 |
|
Color Balance對話盒 |
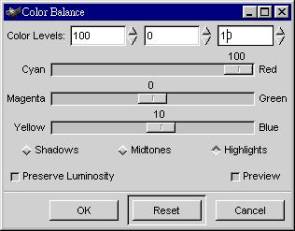
l 根據DB Browser對話盒所查到的資料,(gimp-color-balance sboub 2 1 100 0 10) 各參數的意思為: 第1個參數sboub,表示欲執行color balance功能的圖層的名字。 第2個參數2,表示Highlight模式。 第3個參數1,表示Preserve Luminosty。 第4、5、6個參數100 0 10,表示cyna-red、magenta-green、yellow-blue三個Color Levels的值設為 100 0 10。 l 根據上面的推測,設定Color Balance對話盒的參數如左圖。 |
|
|
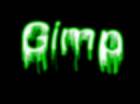
l 按下Color Balance對話盒OK按鈕,得到左圖。 l 增加亮部(highlight)的紅顏色的量到100,藍顏色的量到10。 |

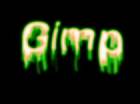
若要再更瞭解,只有靠自己了。加油!!